Black outdoor wall lighting isn’t just another decorating trend, it’s a practical choice that’s been quietly dominating exterior design for good reason. Where brushed nickel and bronze fixtures can clash with modern materials like metal siding, fiber cement, or dark trim, black fixtures disappear against shadows and complement nearly every architectural style. They’re forgiving on coastal homes where salt spray would pit lighter finishes, and they hide the inevitable spider webs and pollen better than their shiny counterparts. Whether someone’s flanking a craftsman-style front door or lighting a contemporary back patio, black wall sconces offer flexibility that other finishes can’t match.
Table of Contents
ToggleKey Takeaways
- Black outdoor wall lighting complements any architectural style and hides grime better than lighter finishes, making it a practical choice for modern homes.
- Powder-coated black aluminum and steel resist UV degradation and conceal scratches and water spots without the chalking issues common in lighter colors.
- Proper mounting height matters: install fixtures 66 inches above the finished floor for entryways and 48–60 inches for pathway lighting to ensure optimal light distribution.
- Black outdoor wall sconces work equally well with warm and cool LED color temperatures (2700K–4000K) without the color clashing that occurs with brushed nickel finishes.
- Wet-rated black outdoor wall lights with IP65 protection are essential for exposed locations, while proper gaskets and exterior-grade caulking prevent water intrusion and damage.
- Choose lumens over wattage with LEDs: 700–1,300 lumens for entryway fixtures and 300–500 lumens for accent or pathway lighting to avoid overlighting and light pollution.
Why Choose Black Outdoor Wall Lights for Your Home
Black finishes are practical workhorses that hold up better than most homeowners expect. Powder-coated black aluminum or steel resists UV degradation without the chalking issues common in lighter colors. The finish hides minor scratches, water spots, and the grime that accumulates near entryways, stuff that shows up immediately on polished brass or stainless steel.
From a design standpoint, black grounds a facade. It creates visual weight near doorways and transitions between materials without competing for attention. Pair it with white board-and-batten siding, and the contrast is crisp. Install it against charcoal lap siding or natural wood, and it blends while still defining the fixture’s shape.
Outdoor wall sconces black finishes also suit both warm and cool color palettes. They work with warm-toned brick, stone, and cedar as easily as they do with cool grays, blues, and modern composites. That versatility matters when someone’s updating exterior lighting but not ready to repaint the whole house.
One less-discussed advantage: black fixtures pair well with smart bulbs and warm LED sources without the color temperature clashing against the fixture itself. Brushed nickel can look sickly under 2700K LEDs: black doesn’t care. For homeowners layering smart home technology into their exterior systems, that compatibility simplifies the decision.
Popular Styles of Black Outdoor Wall Lighting
Modern and Contemporary Black Fixtures
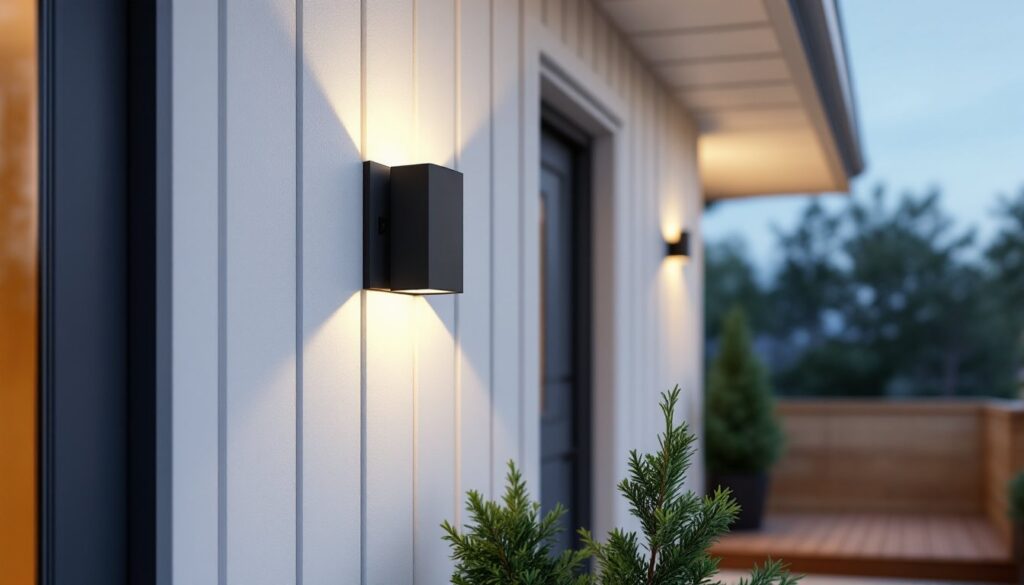
Geometric forms dominate this category: square cages, cylindrical up/downlights, and asymmetric LED panels. Look for fixtures with clean lines, minimal ornamentation, and integrated LED modules rather than Edison-style bulbs. Materials typically include powder-coated aluminum or stainless steel with a matte black finish, avoid anything labeled “black chrome” unless going for industrial edge.
Up/down wall sconces (also called bidirectional fixtures) are especially useful on modern homes. They cast light both up and down the wall plane, creating ambient glow without glare. Mounting height matters here: install the center of the fixture at 66 inches above the finished floor for best distribution, unless architectural features dictate otherwise.
Cube and rectangular box fixtures work well flanking garage doors or along fence lines where multiple units need to read as a unified system. Keep spacing consistent, typically 8 to 10 feet apart for pathway visibility, and verify the fixture’s IP rating. Look for at least IP65 (dust-tight, protected against water jets) for locations exposed to weather.
Farmhouse and Rustic Black Wall Lights
Farmhouse fixtures lean heavily on gooseneck arms, seeded glass shades, and barn-style hoods. The black finish here reads as forged iron or aged metal rather than sleek contemporary. Seeded or clear glass shades soften the light output and add texture, but they’ll collect insects, plan to clean them a few times per season or choose enclosed LED fixtures.
Gooseneck sconces should have an arm length proportional to the wall: 12- to 14-inch arms for standard siding, longer if the fixture needs to clear deep eaves or wide trim. The backplate should mount to solid framing or blocking, not just siding. If the existing electrical box isn’t backed by a stud, add a retrofit brace or mounting block to spread the load.
For authentic farmhouse style, look for fixtures with exposed hardware, visible screws, cage guards, or metal strapping. Combine them with warm-white LEDs (2700K to 3000K) to mimic the glow of old incandescent barn lights. Avoid cool-white LEDs above 4000K: they’ll make the space feel sterile rather than rustic.
Best Placement Ideas for Black Outdoor Wall Lights
Entryway and porch lighting is non-negotiable for safety and curb appeal. Flank the front door with matching fixtures mounted 66 to 72 inches above the porch floor, or use a single larger fixture centered above the door if the architecture allows. The goal is even illumination across the landing, no harsh shadows that hide steps or door hardware.
Garage entries and side doors get overlooked, but these are high-traffic zones. A single wall sconce near the latch side of the door, mounted at 60 inches, provides task light for fumbling with keys. Wire it to a photocell or smart switch so it’s automatic, nobody wants to dig for a light switch in the dark with groceries.
Pathway lighting along fence lines or walls works best when fixtures are spaced 8 to 10 feet apart, mounted 48 to 60 inches high. This keeps the beam pattern low and minimizes light trespass into neighbors’ yards, important in suburban lots. If the HOA has lighting ordinances, check them before installation: some restrict lumens or require shielded fixtures.
For decks and patios, mount sconces on posts or walls at sitting height (48 to 54 inches) to create ambient light without glare. Avoid placing them where someone will look directly at the bulb while seated. If the deck has multiple levels, light the transitions between them, missed steps are the leading cause of deck injuries.
Exterior wall lighting near home security cameras should be positioned to avoid glare and backlighting. Place fixtures to the side of the camera’s field of view, not directly behind or in front of it. Modern cameras handle mixed lighting better, but why make the sensor work harder?
How to Choose the Right Black Outdoor Wall Light for Your Space
Start by measuring the wall space and surrounding features. A general rule: the fixture height should be roughly one-quarter the height of the door or wall section it’s lighting. For an 8-foot door, aim for a fixture between 18 and 24 inches tall. Too small, and it looks lost: too large, and it overwhelms.
Lumens matter more than wattage with LEDs. For entry lighting, aim for 700 to 1,300 lumens per fixture (equivalent to a 60- to 100-watt incandescent). For accent or pathway lighting, 300 to 500 lumens is plenty. Overlighting washes out architectural details and irritates neighbors, more isn’t always better.
Check the fixture’s light distribution pattern: some cast a wide flood, others a narrow downlight. Up/down fixtures are good for ambient lighting but poor for task lighting like key entry. Shielded or hooded fixtures direct light downward, reducing light pollution and skyglow, increasingly regulated in dark-sky communities.
Weather resistance is non-negotiable. Look for a wet-rated fixture (suitable for direct rain exposure) if it’s under an open porch or wall without overhang. Damp-rated fixtures are fine under covered areas but shouldn’t face wind-driven rain. Coastal installations need corrosion-resistant materials, powder-coated aluminum or marine-grade stainless steel, not plain steel or zinc alloy.
Bulb type matters. Integrated LED fixtures last 20,000 to 50,000 hours but can’t have the bulb replaced easily. Socket-based fixtures (E26 medium base) allow bulb swaps and smart bulb upgrades, but the socket hardware should be sealed against moisture. For design inspiration and material pairings, consider how the fixture will age alongside siding, brick, or stone finishes.
Installation Tips for Black Outdoor Wall Lighting
Turn off power at the breaker, not just the switch. Use a non-contact voltage tester to verify the circuit is dead before touching any wires. Exterior lighting circuits are often shared with outlets or other fixtures, so test thoroughly.
Most wall sconces mount to a standard 4-inch round or octagonal electrical box. The box must be weatherproof-rated (a spring-loaded or gasketed cover when not in use) and secured to solid framing. If the existing box is surface-mounted to siding with no backing, install a cut-in box with adjustable ears or a mounting block made from PVC or composite material. The block should extend past the siding to create a flat, sealed surface.
Gaskets and caulk are critical. Most fixtures include a foam gasket for the backplate. Don’t skip it, and add a bead of exterior-grade silicone caulk around the top and sides of the mounting block (leave the bottom open for drainage). Water intrusion behind siding is a fast track to rot and mold.
Wire connections should use wire nuts rated for outdoor use or push-in connectors with silicone sealant. Black (hot) to black, white (neutral) to white, and bare copper (ground) to the green ground screw on the fixture and the box. Tuck the connections neatly into the box, don’t let them hang loose where they can chafe against the fixture body.
Mounting hardware matters. Use the screws provided with the fixture: they’re typically corrosion-resistant. If the fixture is heavy (over 5 pounds), make sure the electrical box is rated for the weight. Retrofit ceiling boxes often aren’t adequate for heavy wall sconces, check the box label.
After installation, test the fixture and check for light leaks around the backplate. If light escapes, the gasket isn’t seated properly. Remove the fixture, clean the mounting surface, and reinstall with fresh caulk if needed.
Permit and code notes: Most jurisdictions allow homeowners to replace existing light fixtures without a permit, but adding new circuits or relocating fixtures typically requires an electrical permit and inspection. The National Electrical Code (NEC) requires all outdoor receptacles and fixtures to be GFCI-protected if within 6 feet of grade. Some local codes are stricter. When in doubt, call the building department or hire a licensed electrician, especially for anything involving a new circuit or service panel work.

