Farmhouse pendant lighting sits at that sweet spot where function meets character. These fixtures aren’t just about throwing light downward, they’re about anchoring a room with texture, warmth, and a nod to simpler times without feeling dated. Whether someone’s renovating a century-old kitchen or softening the edges of a modern build, farmhouse pendants deliver visual weight and practical illumination in equal measure. They work in spaces where recessed cans feel cold and chandeliers feel overdone. The key is understanding what makes them distinct, where they shine brightest, and how to hang them without calling an electrician every time.
Table of Contents
ToggleKey Takeaways
- Farmhouse pendant lighting balances ruggedness and warmth by using weathered materials, aged finishes, and intentional imperfections that set it apart from cold industrial or overstated chandeliers.
- Hang farmhouse pendants 30–36 inches above kitchen countertops and 30–34 inches above dining tables, spacing them 24–30 inches apart for even task coverage and visual balance.
- Choose warm white LED bulbs (2700K–3000K) in Edison or filament styles, and opt for dimmable options in dining areas to avoid harsh lighting during meals.
- Farmhouse pendant lighting works best over kitchen islands, dining tables, breakfast nooks, and entryways, but avoid low placements in bedrooms with 8-foot or lower ceilings.
- Most direct fixture swaps are DIY-friendly if a junction box exists, but new installations over islands require running new wiring and may need permits and professional electrician help.
- Mix farmhouse pendants with modern, transitional, industrial, or coastal styles by pairing them with consistent color temperatures and complementary materials like shaker cabinets, concrete, or light wood.
What Makes Farmhouse Pendant Lighting Unique?
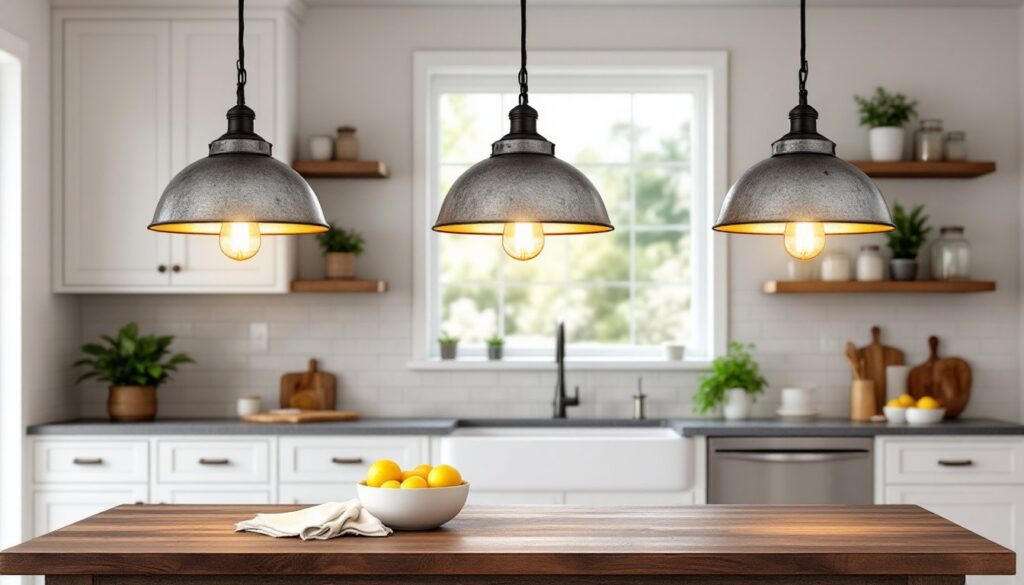
Farmhouse pendant lights pull from rural American and European design traditions, think barns, workshops, and early 20th-century schoolhouses. The style leans heavily on raw or weathered materials: metal shades (often galvanized steel, wrought iron, or oil-rubbed bronze), exposed Edison bulbs, wire cages, clear or seeded glass, and wood accents.
What sets them apart from industrial or modern pendants is the balance of ruggedness and warmth. Industrial fixtures skew utilitarian and can feel sterile. Farmhouse pendants soften that edge with rounded curves, aged finishes, and intentional imperfections like hammered metal or distressed paint. They’re less about minimalism and more about lived-in character.
Typical features include:
- Metal shades with a flared or dome profile (10″ to 16″ diameter is common)
- Edison-style bulbs (40W to 60W equivalent LED for warmth)
- Adjustable hanging rods or chains, usually 36″ to 48″ before trimming
- Matte or antiqued finishes rather than polished chrome
These fixtures also tend to be single-bulb designs, which keeps them from overpowering smaller spaces. Multi-light versions exist but usually cluster three or more pendants rather than packing bulbs into one fixture. That modularity is part of their appeal, homeowners can scale the look up or down depending on the space.
Best Rooms for Farmhouse Pendant Lights
Farmhouse pendants excel in spaces where task lighting and ambiance overlap. They’re not flood lights, they’re focused, intentional, and meant to define zones within a room.
Kitchen Islands and Dining Areas
This is where farmhouse pendants do their heaviest lifting. Over a kitchen island, they provide direct light for chopping, plating, and cleanup while adding visual interest at eye level. Standard practice is to hang them 30″ to 36″ above the countertop, high enough to avoid head strikes, low enough to keep light concentrated.
For islands between 4′ and 6′ long, two pendants work well, spaced evenly. Wider islands (7′ or longer) benefit from three fixtures. Keep spacing consistent, typically 24″ to 30″ apart, and centered over the work surface, not the cabinetry.
Dining tables follow similar rules: 30″ to 34″ above the tabletop for an 8-foot ceiling. If ceilings are higher (9′ to 10′), add 3″ of clearance per extra foot. Farmhouse pendants pair especially well with reclaimed wood tables and linen or cotton textiles. For more ideas on balancing kitchen lighting over work zones, consider how pendant spacing affects both task coverage and aesthetics.
Other strong placements include:
- Breakfast nooks: A single pendant over a small round table creates intimacy without crowding.
- Entryways and mudrooms: A pair flanking a console or bench adds practical light and sets the tone.
- Laundry rooms: Swap out builder-grade flush mounts for a farmhouse pendant to elevate a purely functional space.
Avoid placing them in bedrooms unless the ceiling is at least 9′ tall, low-hanging fixtures over a bed feel oppressive and can interfere with making the bed.
Choosing the Right Style for Your Space
Not all farmhouse pendants are created equal. The devil’s in the details, finishes, bulb visibility, and shade shape all shift the vibe.
Metal shade style: Gooseneck or barn-style shades (often called “warehouse shades”) lean traditional farmhouse. Wire cage pendants with exposed bulbs skew more modern-rustic and pair well with concrete or subway tile. Homeowners with darker cabinets should consider lighter finishes, brushed nickel or galvanized metal, to avoid a cave effect.
Glass options: Clear glass with seeded or rippled texture adds softness and diffuses light without hiding the bulb. Frosted or milk glass shifts the look toward vintage Americana, which works in homes with beadboard, shiplap, or painted brick. Sites like Southern Living often showcase how regional homes balance glass fixtures with natural wood tones.
Bulb choice matters: Farmhouse fixtures are designed to show off the bulb. Stick with warm white LEDs (2700K to 3000K) in Edison or filament styles. Avoid cool white (4000K+), it kills the warmth. Dimmable bulbs are non-negotiable for dining areas: a 100W equivalent at full blast during dinner feels like an interrogation.
Scale and proportion: A 12″ shade works over a compact island or table. Larger islands (6′ or more) can handle 14″ to 16″ shades without looking cartoonish. If the ceiling is 8′ or lower, avoid overly tall fixtures, anything over 18″ from canopy to shade bottom will dominate the sightline.
For inspiration on matching lighting fixtures for different kitchen layouts, explore how shade diameter and hanging height affect perceived space.
How to Install Farmhouse Pendant Lighting
Swapping out an existing fixture for a farmhouse pendant is a straightforward DIY if there’s already a junction box in place. Adding new fixtures, especially over an island, requires running new wiring and possibly opening the ceiling, which may need a permit depending on local codes (check with the AHJ, or authority having jurisdiction).
Tools and materials:
- Voltage tester (non-contact)
- Wire strippers
- Screwdriver set (flathead and Phillips)
- Ladder or step stool
- Wire nuts (usually included with fixture)
- Electrical tape
- Junction box (if adding new fixture)
- Safety gear: safety glasses, work gloves
Step-by-step for a direct swap:
- Cut power at the breaker. Confirm it’s off with a voltage tester at the existing fixture.
- Remove the old fixture. Unscrew the canopy, disconnect the wires (usually black to black, white to white, ground to ground), and remove the mounting bracket.
- Inspect the junction box. It should be rated for the pendant’s weight (check the fixture specs, most farmhouse pendants weigh 3 to 8 lbs). If the box is plastic and the pendant is over 5 lbs, swap it for a metal “fan-rated” box anchored to a ceiling joist.
- Adjust the hanging length. Most pendants come with 6′ to 10′ of cord or chain. Measure the desired drop (30″ to 36″ for countertops), then trim excess cord and rewrap it inside the canopy. For chain, remove links with pliers.
- Connect the wires. Match black (hot) to black, white (neutral) to white, and green or bare copper (ground) to ground. Twist clockwise, secure with wire nuts, and wrap the base of each nut with electrical tape.
- Mount the canopy to the junction box using the provided screws. Tuck wires neatly inside, don’t force the canopy if wires are bunched.
- Install the bulb and restore power. Test the switch.
For new installations (e.g., adding pendants over an island where none existed):
- Run 14/2 or 12/2 NM cable (Romex) from an existing circuit to the new location. This requires fishing wire through walls or the attic, which is easier before drywall but doable after with a fish tape.
- Install a junction box secured to a ceiling joist or blocking. Pancake boxes work for finished ceilings: use a remodel box with wings if there’s no joist access.
- Electrical codes (NEC Article 210) require kitchen circuits to be 20A. Don’t tap into a 15A lighting circuit if the island pendants will share a load with high-draw appliances.
If the ceiling is vaulted or over 10′ high, consider hiring an electrician. Working on a ladder at awkward angles increases the chance of mistakes or injury. Many jurisdictions require a licensed electrician to pull permits for new circuits anyway.
For more targeted guidance on fixtures positioned over sink areas where plumbing and lighting intersect, check placement and clearance specs before drilling.
Mixing Farmhouse Pendants with Other Decor Styles
Farmhouse lighting doesn’t demand a full-on Joanna Gaines aesthetic. It’s flexible enough to layer into modern, transitional, and even industrial spaces if done with intention.
Modern farmhouse: Pair black metal pendants with white shaker cabinets, quartz countertops, and stainless appliances. Keep the rest of the palette neutral, grays, whites, natural wood, and let the pendants be the textural anchor. Avoid clutter: the style thrives on edited simplicity.
Transitional blends: Combine farmhouse pendants with upholstered dining chairs, a mix of metal and wood furniture, and soft textiles. This is where brass or brushed nickel finishes shine, they bridge rustic and refined without leaning too hard in either direction.
Industrial crossover: Use wire-cage or exposed-bulb pendants alongside concrete, steel shelving, and subway tile. The key is keeping finishes raw, think matte black or gunmetal, not polished chrome. Design platforms like Homify showcase how exposed structural elements complement cage-style fixtures.
Coastal or Scandinavian: White or light gray metal shades with Edison bulbs soften industrial edges and pair beautifully with linen, light wood, and plenty of natural light. Avoid overly distressed finishes, clean lines and subtle texture work better.
Don’t feel locked into one pendant style per room. Mixing a farmhouse pendant over the island with recessed cans for general lighting and under-cabinet LEDs for task work creates a layered, functional lighting plan. Just keep color temperatures consistent (all warm white, for example) so the space doesn’t feel disjointed. For additional ideas on layering over kitchen sink lighting, think about how ambient, task, and accent layers interact.
Conclusion
Farmhouse pendant lighting does more than fill a ceiling, it defines spaces, anchors design choices, and delivers focused light where it’s needed most. Whether someone’s swapping a single fixture or planning a full kitchen remodel, the principles stay the same: scale to the space, hang at the right height, and let the materials speak. With a little planning and a voltage tester, most installations are well within DIY reach.

