Farmhouse lighting has moved beyond kitchen islands and dining rooms. Outdoor spaces, front porches, garage entries, patios, are where these fixtures make their biggest visual impact. The right fixture blends nostalgia with function, delivering both ambient light and architectural character. Unlike trendy styles that age poorly, farmhouse lighting’s utilitarian roots keep it relevant year after year. Whether you’re replacing a builder-grade fixture or adding accent lighting to a dark walkway, understanding the hallmarks of outdoor farmhouse design helps you choose fixtures that won’t look out of place in five years.
Table of Contents
ToggleKey Takeaways
- Outdoor farmhouse lighting combines nostalgia with function using durable materials like galvanized steel, powder-coated aluminum, and wrought iron that resist weathering and require minimal maintenance.
- Barn lights, gooseneck fixtures, and lantern-style pendants are the best types of outdoor farmhouse lighting, with barn lights mounted 60 to 66 inches above grade for optimal illumination at entryways.
- Choose fixtures sized at one-quarter to one-third the width of the door or wall they serve—an 8- to 12-inch fixture suits a 36-inch front door, while 14- to 16-inch barn lights work for double garage doors.
- Always verify wet-location UL ratings for fixtures exposed to direct rain or sprinkler spray; damp-rated fixtures are insufficient for unprotected outdoor spaces and can void warranties.
- Prioritize LED filament bulbs (2200K to 2700K) for exposed bulbs and measure lumens rather than wattage—1000 lumens suits a standard front door while 1500 to 2000 lumens are needed for garage doors and wide porches.
- Proper installation requires waterproof wire nuts, foam gaskets or silicone caulk behind mounting plates, secure fastening to structural support (not just drywall), and local code compliance including potential GFCI protection.
What Is Farmhouse Lighting and Why It Works Outdoors
Farmhouse lighting borrows from early 20th-century agricultural and industrial design. Expect clean lines, simple shapes, and materials that can take a beating: galvanized steel, powder-coated aluminum, wrought iron, and sealed glass. Most fixtures feature exposed bulbs or seeded glass shades that soften glare without blocking lumens.
Outdoor farmhouse fixtures share DNA with barn lights, gooseneck fixtures, and warehouse pendants. They skip ornate scrollwork in favor of functional hardware, think heavy-duty mounting plates, visible screws, and wire guards. This simplicity translates well to exterior use because there are fewer crevices to trap moisture and fewer painted details to peel or fade.
The style works outdoors for practical reasons. Matte black, oil-rubbed bronze, and galvanized finishes hide dirt and water spots better than polished chrome or brass. Deep-shade designs protect bulbs from rain and reduce glare. Many barn-style fixtures offer wet-location UL ratings, meaning they’re safe for uncovered porches and open patios where direct weather exposure is routine.
Another advantage: farmhouse fixtures pair with almost any siding material. They complement board-and-batten, lap siding, brick, stone, and stucco. That versatility makes them a safe bet if you’re updating exterior lighting without committing to a full facade renovation.
Best Types of Outdoor Farmhouse Light Fixtures
Wall Sconces and Barn Lights
Barn lights are the workhorses of outdoor farmhouse lighting. They mount flush to exterior walls, casting wide pools of downlight. Look for fixtures with 12- to 16-inch shades for front porches and garage doors: smaller 8- to 10-inch versions suit side entries and shed doors. Most use a single medium-base E26 socket and work with LED, CFL, or traditional incandescent bulbs.
Gooseneck arms add vertical interest and keep the shade away from the wall, reducing heat buildup and moisture trapping behind the fixture. Adjustable goosenecks let you fine-tune the angle, which matters if your siding isn’t perfectly vertical or if you want to direct light toward a pathway.
Wall sconces with cage guards or ribbed glass shades bring a nautical-industrial hybrid look. These work well flanking garage doors or on either side of a mudroom entry. Choose sconces rated for damp locations at minimum: if the fixture sits under an open soffit or exposed overhang, upgrade to a wet-location rating.
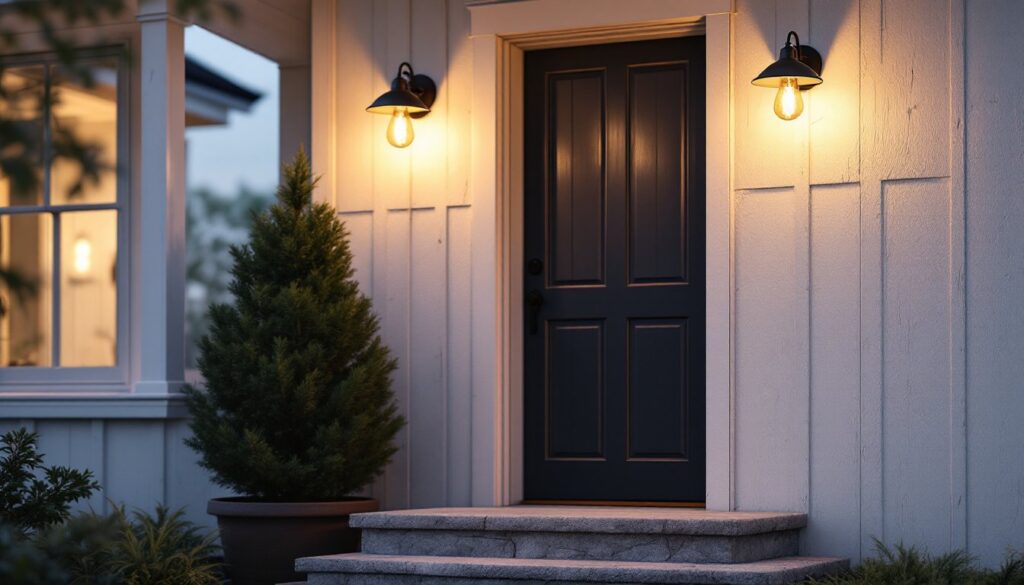
Install barn lights and sconces 60 to 66 inches above finished grade at entryways. That height puts the light at eye level for someone standing at the door while keeping the fixture high enough to illuminate the threshold. For garage or barn doors, center fixtures 12 to 18 inches above the door header so light spreads evenly across the opening.
Pendant Lights and Lanterns
Outdoor pendant lights suit covered porches, pergolas, and breezeway ceilings. They hang from a canopy or chain, dropping 12 to 36 inches depending on ceiling height. Match the drop length to your space: low-slung pendants (12 to 18 inches) fit 8-foot ceilings, while taller porches can handle 24- to 36-inch drops without creating a head-knock hazard.
Farmhouse pendants often use seeded glass globes, wire cages, or perforated metal shades. Seeded glass diffuses LED point sources, which can look harsh in clear globes. Wire cages protect bulbs in high-traffic areas, good for porches where kids or pets run past.
Lantern-style fixtures with hinged doors and metal frames recall carriage lights but skip the Colonial details. They work as porch pendants or post-mount fixtures. If you’re mounting a lantern on a 4×4 post (actual dimensions 3.5 x 3.5 inches), use a post-mount adapter plate to span the full width and prevent wobble. Secure the plate with 3-inch exterior-grade screws driven into the post core, not just the outer edges.
For patios and outdoor dining areas, cluster two to three pendants over a table to mimic the look of interior lighting while maintaining weather resistance. Use fixtures rated for wet locations if the area is fully exposed to rain. Damp-rated fixtures work under solid roof overhangs where rain won’t blow in.
How to Choose the Right Outdoor Farmhouse Lighting for Your Space
Start by measuring your mounting surface. A fixture that looks perfect on a product page can overwhelm a narrow door or get lost on a wide garage wall. As a rule, the fixture width should be one-quarter to one-third the width of the door or wall section it serves. For a 36-inch-wide front door, an 8- to 12-inch-wide fixture balances the proportions. Double garage doors (16 feet wide) can handle two 14- to 16-inch barn lights spaced symmetrically.
Check the UL wet-location rating if the fixture will face direct rain, snow, or sprinkler spray. Damp-rated fixtures are fine under covered porches with solid roofs, but wet-rated models use sealed gaskets and waterproof wiring to survive full exposure. This distinction matters more than finish color, installing a damp-rated fixture in an exposed location voids most warranties and invites electrical shorts.
Bulb type affects both appearance and maintenance. LED filament bulbs (2200K to 2700K) mimic vintage Edison bulbs without the 60-watt heat output. If your fixture uses an exposed bulb, choose a filament style so the glow looks intentional rather than industrial. For shaded fixtures, standard A19 LED bulbs (800 to 1100 lumens) provide enough light for entryways and porches without glare.
Pay attention to lumens per fixture rather than wattage. A single barn light with a 1000-lumen bulb is enough for a standard front door. Garage doors and wide porches need 1500 to 2000 lumens total, either from one high-output fixture or two moderate ones. Don’t over-light, harsh lighting washes out architectural details and creates stark shadows.
Finish durability varies by material. Powder-coated aluminum resists rust and chips better than painted steel. Galvanized steel develops a weathered patina over time, which fits the farmhouse aesthetic but may not suit every homeowner. Oil-rubbed bronze hides fingerprints and water spots, making it a low-maintenance choice for high-traffic entries. Avoid polished brass or chrome outdoors unless you’re prepared to polish them regularly.
Match your fixture’s scale to your home’s architecture. Single-story ranch homes look best with fixtures in the 10- to 14-inch range. Two-story farmhouses can handle larger 16- to 18-inch barn lights without the fixture looking cartoonish. When in doubt, mock up the size with cardboard before ordering, tape a cutout to the wall and step back to check proportions from the curb.
Installation Tips for DIY Outdoor Farmhouse Lighting
Safety first: Turn off power at the breaker, not just the wall switch. Use a non-contact voltage tester to confirm the circuit is dead before touching any wires. Outdoor electrical work follows NEC Article 410 for fixture installation and Article 406 for receptacle weatherproofing. Local codes may add requirements, especially for circuits near water features or pools.
Most outdoor fixtures mount to a standard round or octagonal electrical box. If you’re replacing an old fixture, inspect the existing box for rust, cracks, or loose mounting. Plastic boxes rated for outdoor use are code-compliant and won’t corrode, but metal boxes offer more support for heavy fixtures. If your new barn light weighs over 10 pounds, upgrade to a metal box rated for 50 pounds or add a separate mounting bracket.
Seal the back of the fixture with a closed-cell foam gasket or silicone caulk to prevent water infiltration behind the mounting plate. Some fixtures include a gasket: if not, cut one from 1/8-inch foam weatherstripping. Run a bead of caulk around the perimeter of the mounting plate after securing the fixture, but leave the bottom edge open so trapped moisture can drain out.
Wire connections follow standard practice: black (hot) to black, white (neutral) to white, and bare copper (ground) to the green screw or ground wire. Use waterproof wire nuts or heat-shrink connectors for outdoor boxes, even if the box is under a covered porch. Standard wire nuts can wick moisture over time. Tuck all connections neatly into the box before tightening the fixture, pinched wires are a common failure point.
If you’re adding a new fixture rather than replacing an existing one, you’ll need to run 14/2 or 12/2 NM-B cable (depending on circuit load) from an existing junction box or breaker panel. This usually requires drilling through wall studs and fishing cable, which is straightforward in unfinished basements or attics but tricky in finished spaces. Check local codes, some jurisdictions require GFCI protection for outdoor lighting circuits, and most require a permit for new circuit runs.
For porch ceilings and pergolas, mount pendants to a pancake box or ceiling-rated junction box secured to a joist or blocking. Don’t rely on drywall anchors or toggle bolts for fixtures over 5 pounds. If you’re installing lighting fixtures for modern kitchens indoors, similar mounting principles apply: always anchor to structure, not finish materials.
Photocell or timer control makes outdoor lighting automatic. Wire-in photocells install between the fixture and the electrical box, turning lights on at dusk and off at dawn. Timers work better if you want lights on for only a few hours each evening. Smart switches with motion sensing can extend bulb life by keeping lights off until someone approaches, though motion sensors sometimes trigger from wind-blown branches or passing cars.
Use a bubble level when mounting barn lights and sconces. Fixtures mounted even slightly crooked are obvious from the street. Mark the screw holes with a pencil, drill pilot holes with a masonry bit (for brick or stucco) or a 1/8-inch twist bit (for wood siding), then drive screws snugly without overtightening. Stripped mounting holes in wood siding can be repaired with toothpicks and wood glue in a pinch, but it’s better to hit solid blocking or use larger screws.
Conclusion
Outdoor farmhouse lighting delivers curb appeal and function without requiring a gut renovation. The fixtures are forgiving to install, pair with most architectural styles, and hold up to weather better than fussier designs. Focus on proper sizing, wet-location ratings, and secure mounting, and you’ll have fixtures that look sharp and work reliably for years.

